

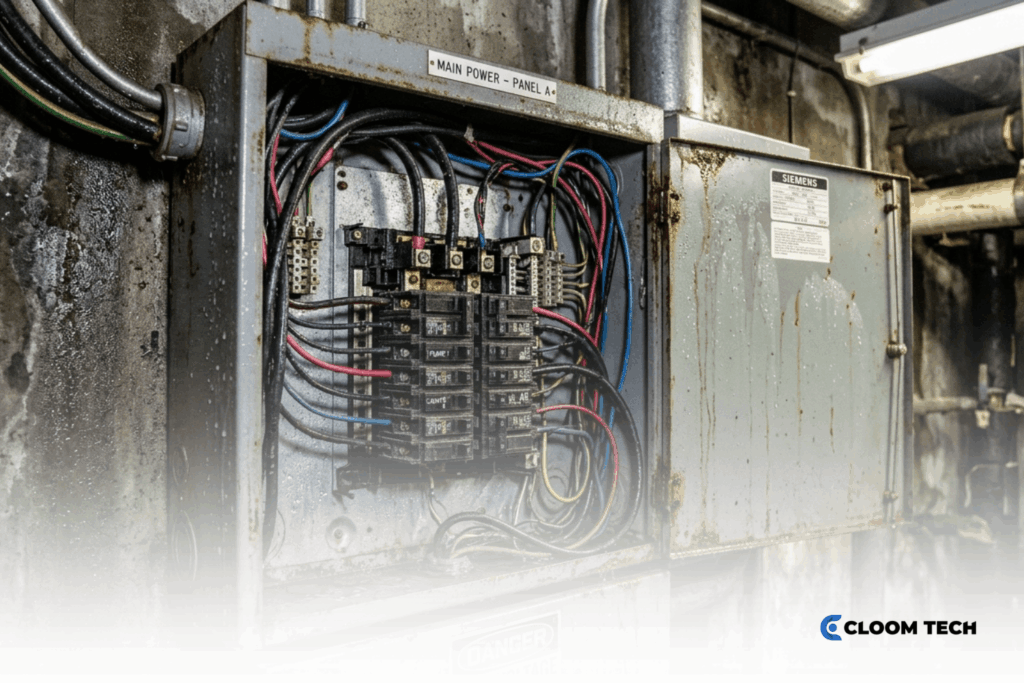
Moisture inside an electrical panel often gets dismissed as a housekeeping issue, even when condensation is already reducing reliability. As humidity changes, the enclosure can develop intermittent faults that consume labor and complicate troubleshooting.
Damage often builds quietly, so many teams respond only after failures appear, rather than controlling moisture as an engineering variable. A stronger strategy builds moisture management into maintenance planning from the outset. By taking proactive steps, teams can prevent condensation, protect uptime, and turn unpredictable moisture failures into a managed risk.
This guide covers why moisture gets into panels in the first place, what damage it causes, a six-step process for removing it, and the long-term prevention habits worth building into your maintenance schedule.

Why does Moisture Enter an Electrical Panel?
Moisture enters an electrical panel through condensation or direct leaks at damaged seals. Condensation starts when internal metal surfaces fall below the air’s dew point temperature inside the enclosure.
After a rapid load change, internal surfaces cool fast, and water vapor condenses into droplets. Outdoor cabinets face repeated swings because sunlight heats the air inside, then night cooling reverses pressure. Pressure cycling pulls moisture inward through a cracked gasket or a loose conduit fitting from poor installation.
High humidity levels in damp plants keep moisture trapped inside enclosures even without visible leaks. Once condensation forms, moisture drives corrosion at terminations and lowers the long-term reliability for the wire harnesses inside panels.
What Moisture does to Your Panel

Moisture rarely causes immediate shutdown, yet it steadily undermines panel performance. In electrical systems with PLCs or precision controls, damp conditions distort signals and reduce measurement stability.
Small leakage paths can disrupt communication, slowing and reducing troubleshooting accuracy. Service teams often spend more time isolating intermittent faults because moisture changes behavior from one cycle to the next. Long exposure can weaken wire harness reliability and reduce termination stability inside the cabinet.
- Corrosion damage: Corrosion increases contact resistance at lugs and terminals, raising heat and speeding up insulation breakdown.
- Board failure: Moisture reduces dielectric strength on control boards, allowing stray current to cross traces and disrupt circuits.
- Contamination risk: Damp interiors can support microbial growth, creating sanitation concerns around enclosed equipment in regulated production spaces.
- Safety exposure: Moisture on energized surfaces increases shock risk when a technician opens the panel before proper isolation
How to Remove Moisture From an Electrical Panel
Removing moisture from a panel requires more than a quick wipe-down. Effective correction starts with a safe shutdown, then moves through sealing, heat control, and air management. A structured process helps prevent moisture, protects equipment condition, and supports a longer service life for harnesses, terminations, and controls.
Step 1: De-energize and assess
Start by shutting down the affected circuit and isolating the electrical panel before any work begins. Safe access comes first because moisture can compromise clearances and increase the risk of shock around exposed parts.
During inspection and maintenance, the electrician should trace the source, check for visible corrosion, and inspect every circuit breaker and terminal for damage. Surface contamination may be cleaned when metal remains sound, yet pitted lugs or damaged conductors need replacement.
Before restoring service, dry the cabinet fully and confirm insulation integrity with a resistance test. Safe moisture removal starts with de-energizing the panel and inspecting all affected parts.
Step 2: Address seals and entry points
After the cabinet is safe, inspect the door gasket, each conduit fitting, and every cable gland. Seal failure often allows direct moisture penetration, especially where the enclosure comes into contact with washdown spray or wind-driven rain.
A damaged seal can allow air to enter during pressure changes, raising the internal moisture load before leaks become visible. Replace degraded materials with approved parts that match the enclosure’s rating and the site’s environmental conditions.
Step 3: Install anti-condensation heaters
Where temperature fluctuations drive repeated moisture cycles, an anti-condensation heater offers a practical correction. Low-wattage anti-condensation heaters keep the temperature and humidity inside the cabinet in a controlled range by warming internal surfaces above the dew point.
Stable heat helps prevent condensation from forming on terminals, wire insulation, and control hardware. Pair the heater with a thermostat so that the unit responds to temperature changes without overheating nearby components.
In outdoor or unconditioned spaces, resistance heaters often provide a practical solution after repeated cooling cycles.
Step 4: Add a desiccant or dehumidifier
A dehumidifier or desiccant works well when moisture loads remain moderate and the cabinet stays mostly closed. Silica packs absorb excess moisture in smaller panels, yet the material must be replaced once saturation reduces performance.
For larger cabinets, an enclosure air conditioner or thermoelectric unit can pull condensation away by cooling a surface that collects and drains condensate. Controlled drying helps manage relative humidity over time without relying on large air exchange.
In compact spaces with stable loads, dried internal air can slow the formation of condensation and protect sensitive electronics.
Step 5: Improve ventilation or install filtered fans
Panels with internal heat buildup may need ventilation to control moisture and operating temperature. Filtered fan systems create a controlled airflow, pushing warmer cabinet air out while drawing in drier replacement air through protected openings.
Fan cooling works best in clean environments where the outside air is drier than the cabinet interior. However, in highly humid areas, drawing in outside air can actually worsen the problem. Proper fan selection should match the enclosure size, the heat load, and the site’s humidity levels.
Step 6: Consider a cabinet dryer system
Where compressed air is available, a cabinet dryer system offers a more robust solution than heaters or passive drying alone. The system uses filtered, dry air to create positive pressure within the enclosure, limiting the intrusion of humid air during washdowns or shutdown periods.
Dryer systems work well in outdoor enclosures and process areas with high humidity, especially when humidity persists around the clock. In severe service, dry-air systems can outperform a standard NEMA 4x cabinet because the air supply keeps moisture from settling on internal surfaces.
Long-Term Prevention
Long-term moisture control depends on routine service rather than a one-time repair plan. Regular inspections protect each enclosure, stabilize humidity, and help prevent condensation in electrical enclosures during pressure changes. Microporous breather vents equalize pressure without directly admitting liquid water from the outside air. Checking cable assembly terminations at the same cadence catches the early corrosion that moisture tends to produce at lug and gland interfaces before it affects signal stability.
- Monthly: Clean or replace ventilation unit filters to maintain stable airflow.
- Quarterly: Inspect door gaskets and conduit seals for cracks or compression set.
- Semi-annually: Clear breather vents and drain openings to allow trapped moisture to escape.
- Annually: Test each heater and dehumidifier, then check for early corrosion near wiring and hardware.
Turning Moisture Control Into Reliability
Moisture control matters because stable panels deliver more predictable performance over time. Routine sealing, controlled airflow, and scheduled inspection reduce the moisture swings that disrupt normal operation. When internal conditions remain steady, PLCs and terminations hold calibration longer, and panel behavior stays consistent from shift to shift.
Every step in this article assumes one thing: the components inside the panel are specified well enough to benefit from those efforts. If the wire harnesses are using inappropriate insulation, loose crimps, or ungrounded shields, no amount of heater wattage or filtered airflow will save them once humidity climbs. Harness quality is where moisture control either pays off or quietly fails.
Cloom Tech manufactures custom wire harnesses and cable assemblies built to IPC/WHMA-A-620 and ISO 9001 standards, with insulation selection, termination method, and sealing specified against the operating environment rather than pulled from a generic catalog. Every assembly is 100% tested before shipment.
Running panels in washdown or high-humidity service? Send us your harness specifications here and a member of our team will respond within 12 hours.
How do You Remove Moisture From an Electrical Panel FAQs
How do ambient climate and seasons change moisture risk in panels?
Ambient climate increases moisture risk by affecting how often panel surfaces cross the dew point. Large day-night swings and humid seasons increase the risk of condensation, so inspection timing and protection methods should match local weather conditions.
Can you safely use a hair dryer or heat gun to dry out a panel?
Not directly on live components, and usually not at all. Heat guns run too hot for most panel insulation and can damage wire jackets, gaskets, and plastic terminal housings. Low-wattage anti-condensation heaters or dry compressed air are safer for on-site drying, and a full resistance test should confirm integrity before the panel is re-energized.
How do you know if moisture inside a panel has caused permanent damage?
Visible corrosion at terminals, discoloration on control boards, or insulation resistance readings below the manufacturer’s minimum are the usual signs. Intermittent faults that persist after the panel has been fully dried also suggest damage has already occurred, since moisture often leaves conductive residue behind even after the water itself evaporates.
How can you protect the internal wiring and harnesses from moisture damage?
Beyond drying the panel, the wiring itself must be resilient. Insulation rating, sealed terminations, and properly drained shield grounding matter most. Specifying IPC/WHMA-A-620 construction as a baseline quality standard. Environment-specific component selection determines service life.
Back to Top: How do You Remove Moisture From an Electrical Panel?
